(4) 2"x4" x 23"
(4) 1"x4" x 14 3/4"
Now we start to mill the side rails. I use a cheap Freud 26 tooth rip blade for this. First I make a rip 1.5" deep by 3/4" wide down the center of the 2x4 (on edge). Do all 4 pieces.
Next reset the saw for a 3/4" deep rip by 1.5" wide. Again rip all 4 pieces such that a 3/4" x 1.5" notch is made.

Now is the time to cut a groove for a slide in tray if you want one. I just set my rip fence for 3/4" and make several passes, adding 1/8" or so on each pass. I end up with the groove about 5/16" or 3/8".

One more rip and we're done. Again set the fence for 1.5" and rip two of the 1"x4" x 14 3/4" pieces.

Now we assemble using outdoor glue. I add some screws after I'm done. The 1"x4" x 14 3/4" piece is the front, providing the landing area.

The 1.5" x 3/4" x 14 3/4" piece is used on edge to seal the back. The remaining piece, 2" x 3/4" x 14 3/4" is laid flat at the back. This gives a place to staple the screen.

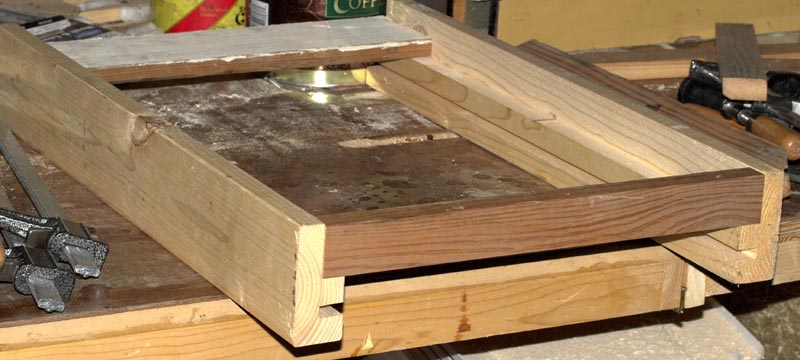
Now staple the screen in place. I don't bother putting in strips along the sides. I just let the screen curl up the sides a 1/2" or so and staple into the side rail. If you need a more rugged bottom for moving hives, you can add strips across the underside, either 1"x4" or 2"x4".